
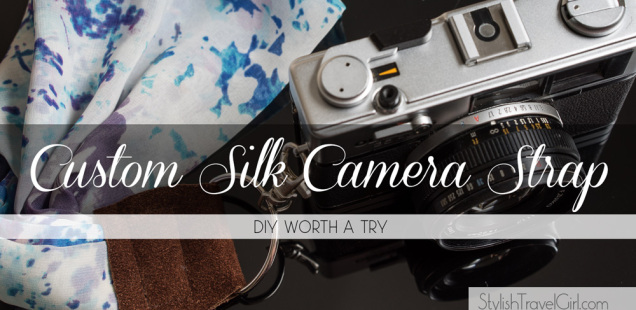
Glam Up Your Camera with a Pro-Quality DIY Silk Scarf Strap
Looking for a way to glam up your travel camera? Personalize your photo taker with a DIY camera strap! Whether you want to carry your camera around your neck or prefer a wrist-sized strap, look no further. We’ve got instructions for both.
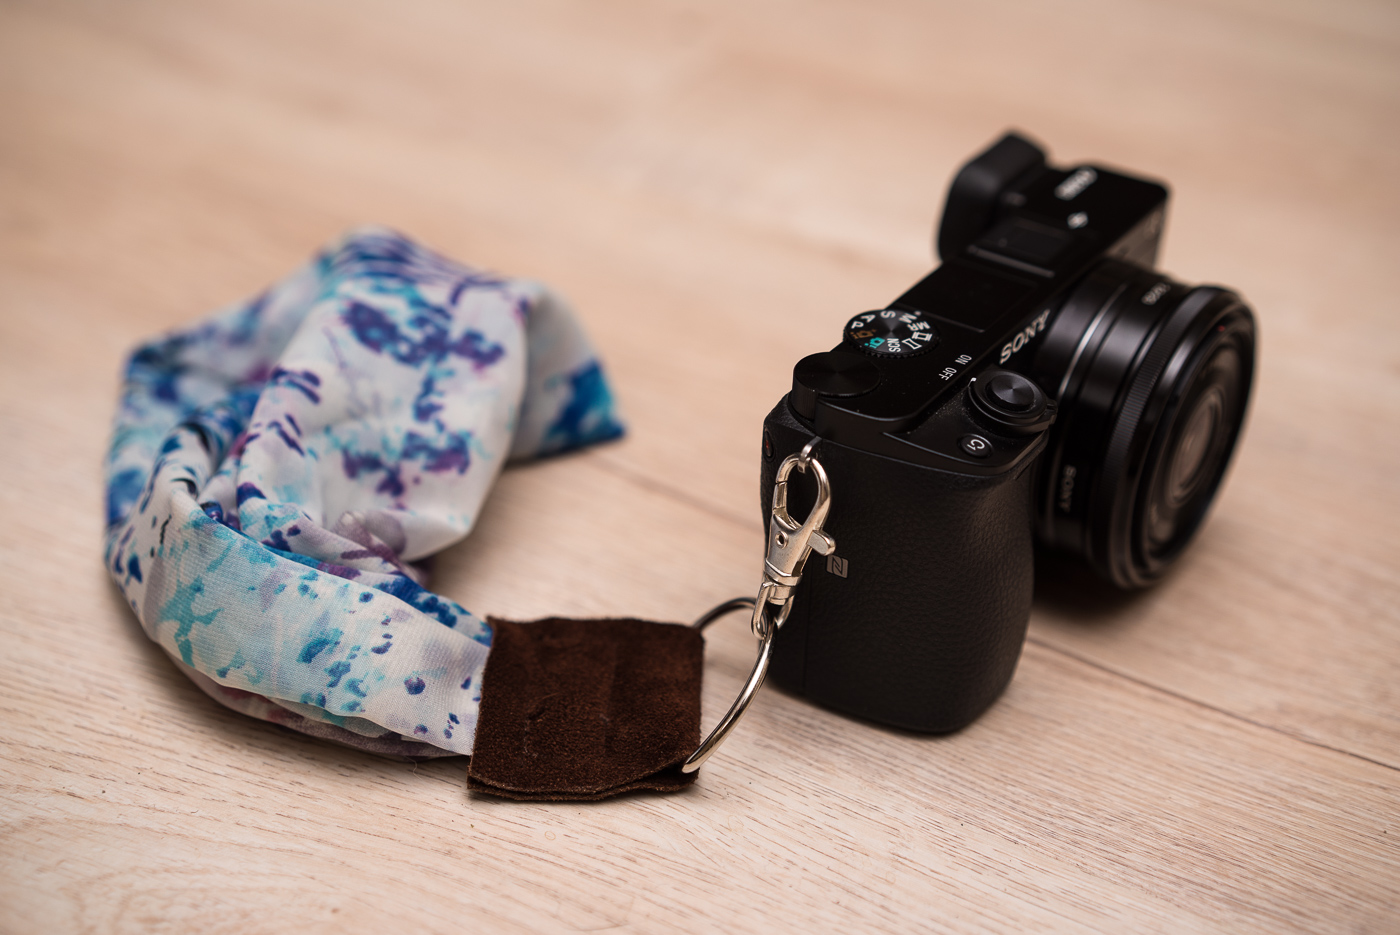
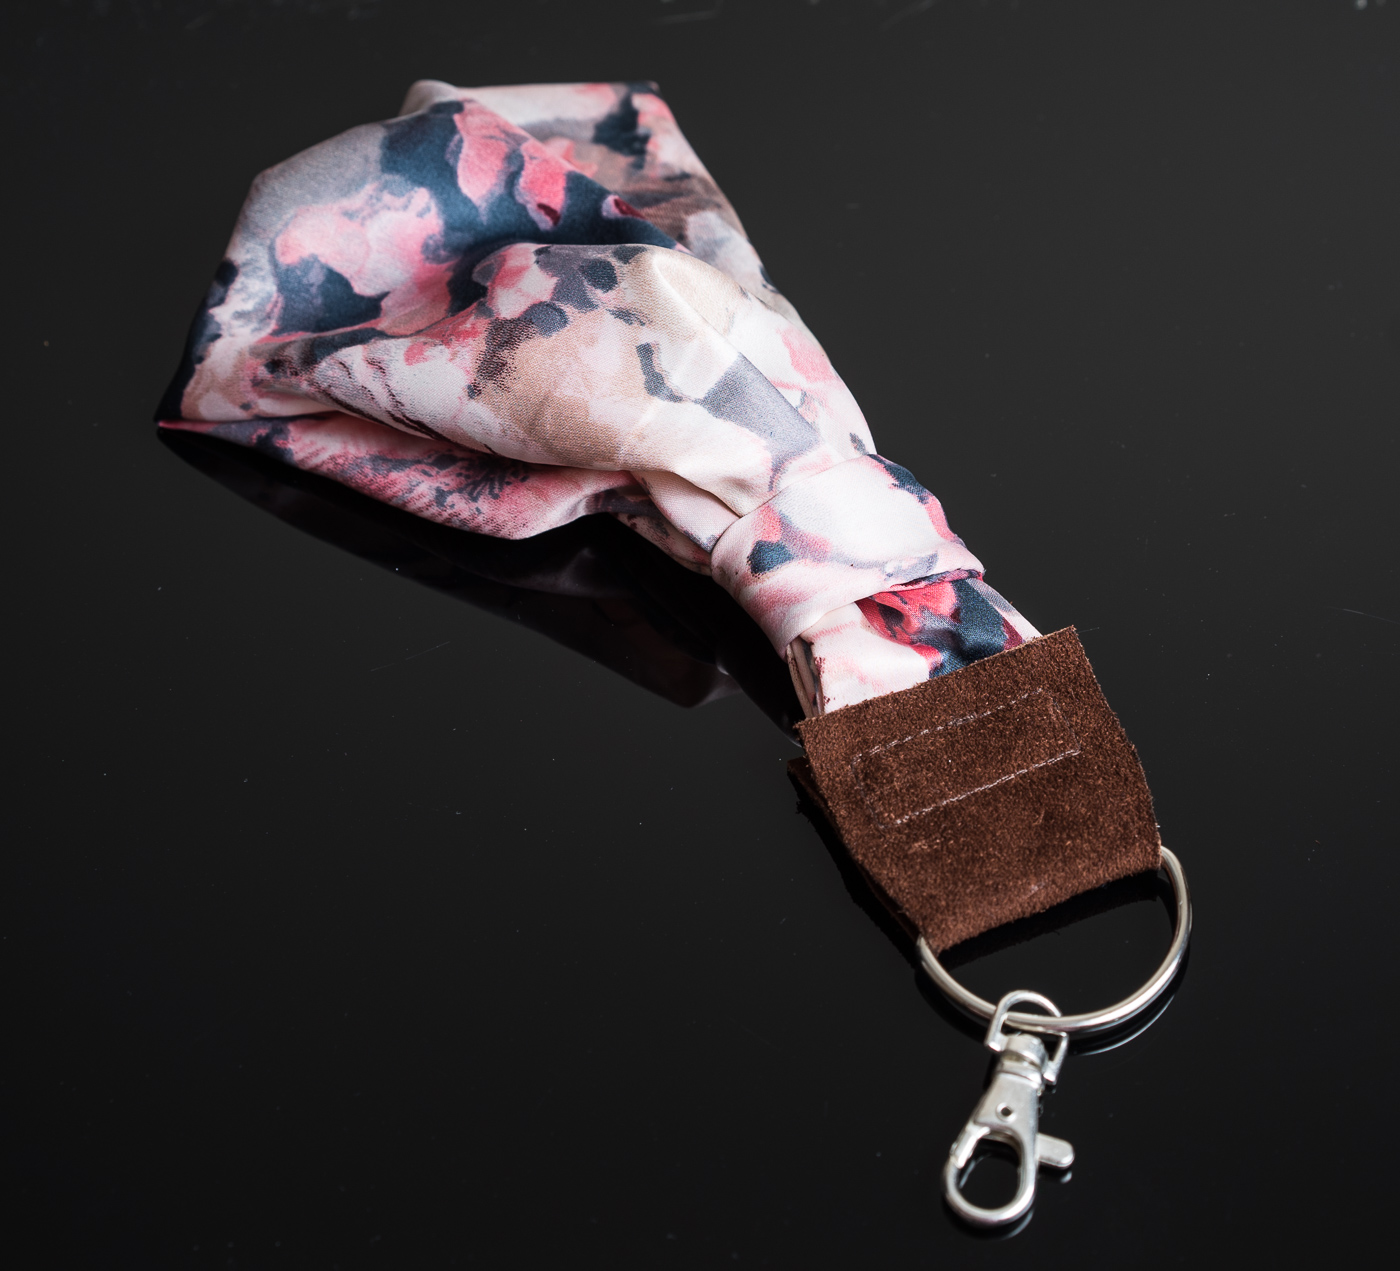
My custom strap on my Sony a6000, a fantastic travel camera
Before making my first strap, I searched far and wide for ideas on how to make one with a professional finish to it. I’m a perfectionist, so I wasn’t into the hand-sewing method used by many craft bloggers out there. With a combination of a couple great tutorials and my own ideas for keeping the quality top-notch, I came up with a process that produces nearly perfect results.
The best DIY camera strap posts I found in my perusing included The House That Lars Built and Chrissy Martin Photography.
How to Make a Custom Silk Camera Strap
(Instructions included for a wrist OR neck strap.)
NEW! Enroll in my video class for this project.
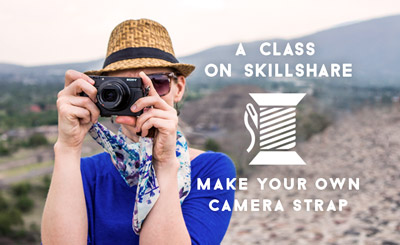
I’ve perfected my strap-making process and made some changes to the instructions I originally posted below. STG readers can enroll for FREE!
1. Gather Your Materials
Whether you’re making a wrist strap or a neck strap, the required materials are the same. You’ll just need slightly less for a wrist strap.
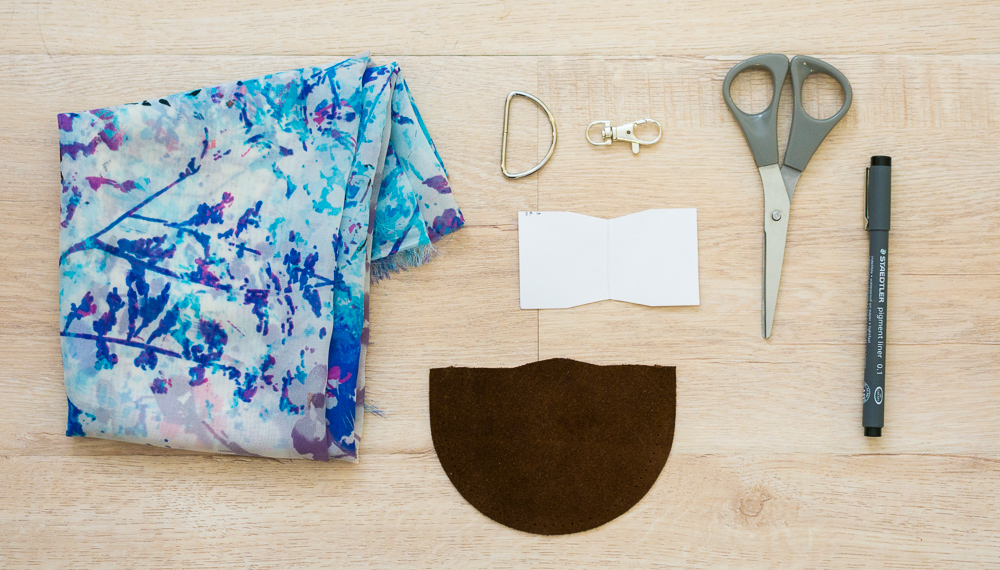
- 1/2 yard fabric or scarf
- suede cowhide or leather scrap (4″ x 1.5″ — 2 pcs needed for neck strap)
- hardware appropriate for your camera
- pen
- scissors
- sewing machine
- thread (matching fabric)
- heavy duty thread (matching leather/suede)
- glue stick
- leather glue
- See the “Pro-Quality Shopping Tips” section at the bottom of this post for help choosing materials.
2. Prepare Your Suede/Leather Piece(s)
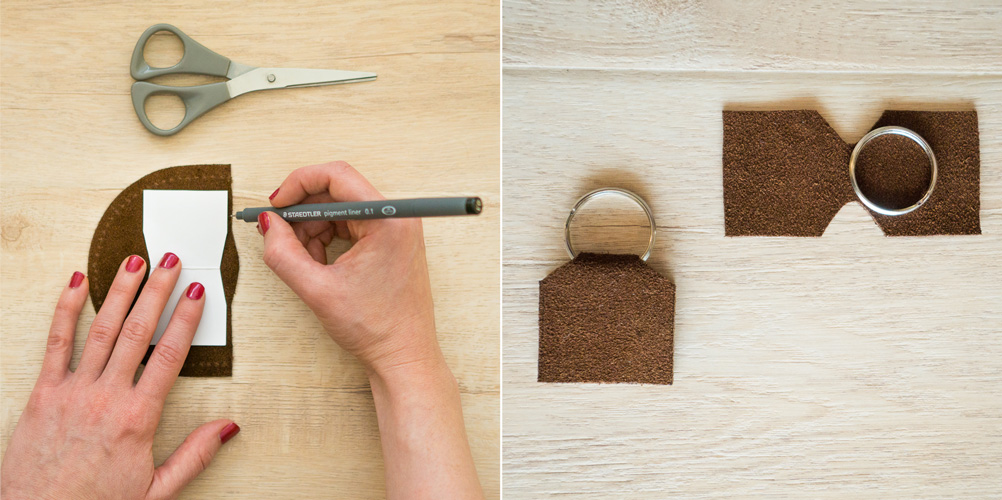
There are several shapes that work for this. A simple rectangle works fine with a D-ring, and a bow-tie shape works better for a keyring. I’ve used the bow-tie shape for all of my straps so far, with D-rings and key rings. It should be symmetrical and at least 1.5″ wide when folded in half, and the center point should match the diameter of your hardware.
Make yourself a pattern and trace it onto the back side of your suede/leather (one for a wrist strap, two for a neck strap) and cut them out.
3. Prepare Your Strap
Part A: Sew a Tube
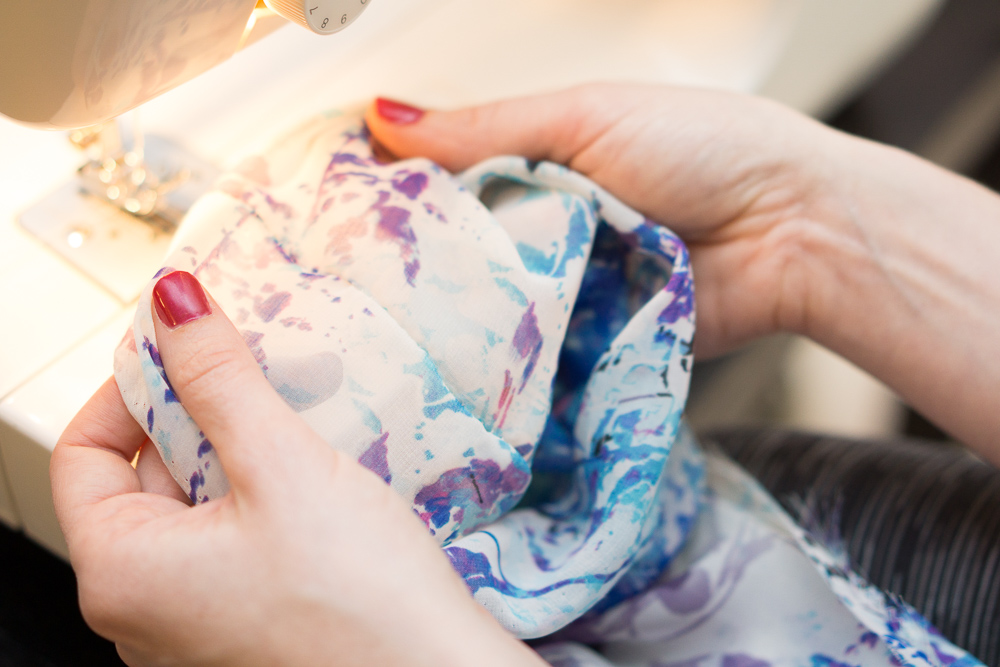
Start with an 18″ wide piece of material. (A little more or less is okay.) Fold it in half hotdog style, with right sides together. The material should now be 9″ wide with the wrong side facing out. Wrap the material around your neck or wrist to determine your desired length. Add 2″ to that length and make your cut.
Take your material, as folded above, and pin along the open edge (across from the folded edge).
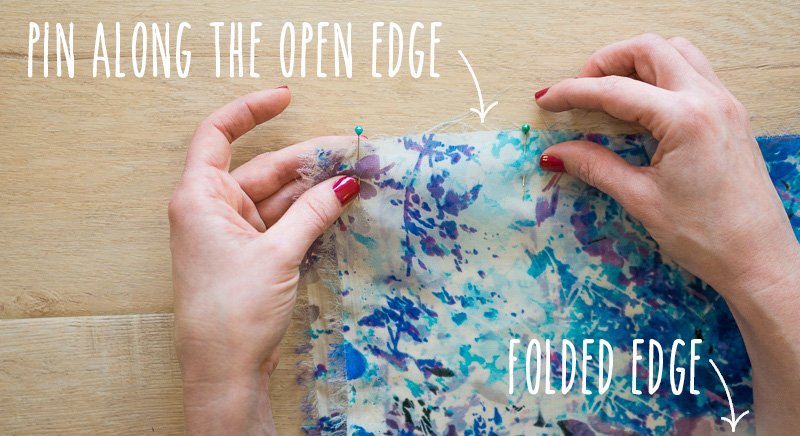
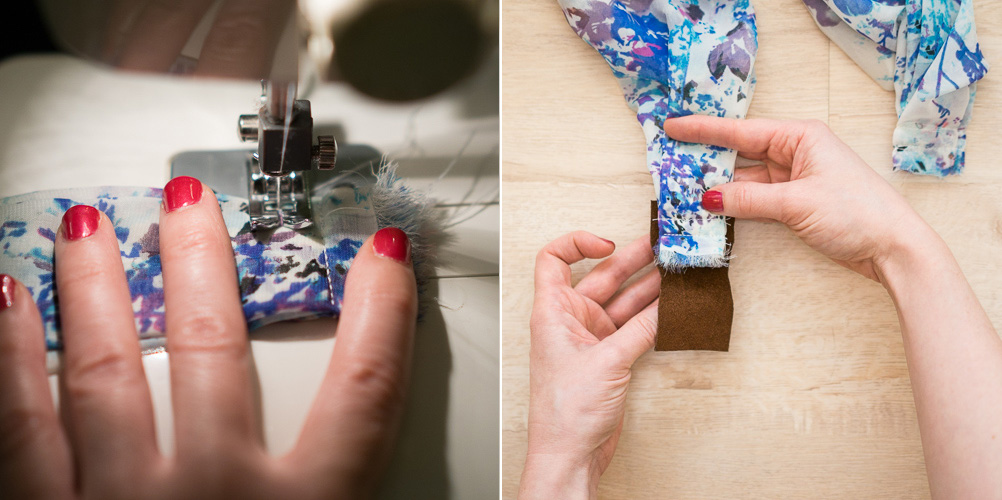
Using standard thread in your machine, sew a zig-zag stitch along the length of the edge, about 3/4″ in. You should now have a tube. Turn right side out.
Part B: Secure the Ends
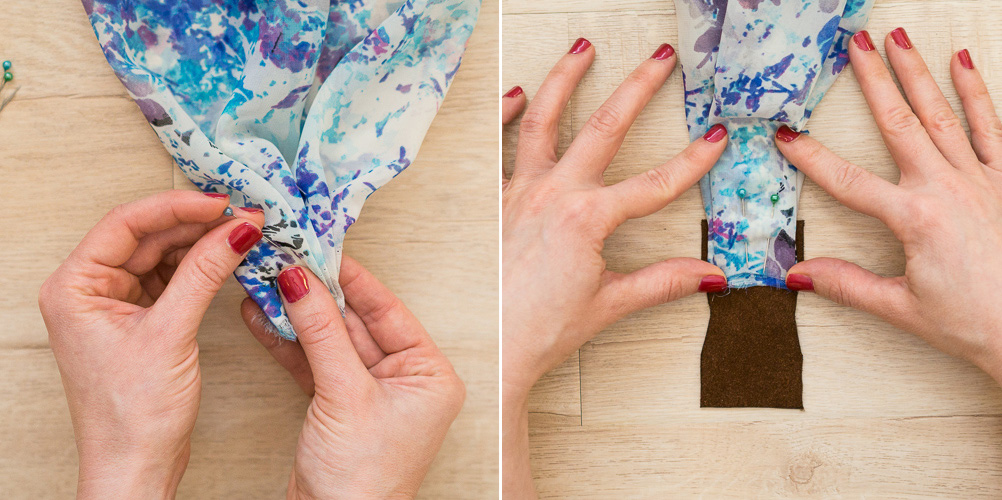
Lay your tube flat with the seam facing up in the center. Take one end of your tube and fold your fabric accordion-style so that it’s about 1/2″ – 3/4″ thinner than the width of your suede/leather piece. Pin it. Place your pinned end on one side of your suede/leather to ensure that the fabric will fit within the edges of your suede/leather. (The leather should extend about 1/4″ to 3/8″ past the fabric on both sides.) Do the same on the opposite end of the tube.
Sew two lines parallel to the bottom edge of your strap, no further up than the suede/leather will reach.
Pro-Quality Tip: If your material has a tendency to fray along your cut edges at your strap’s ends, run a glue stick over both sides of the ends and allow to dry. This will help prevent the material from fraying further.
Thread your machine with your heavy duty thread.
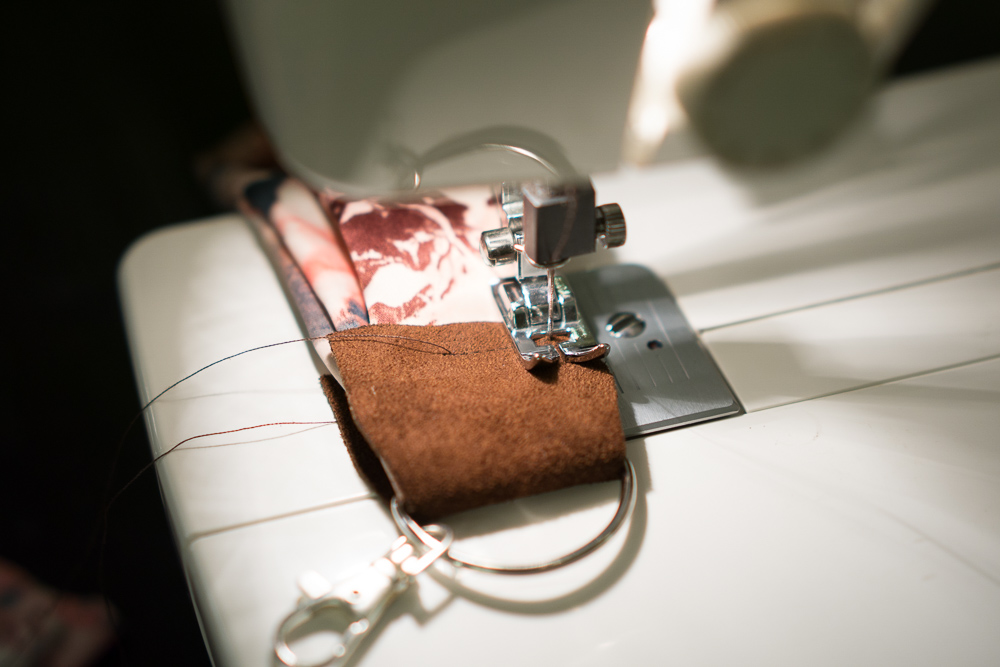
4a. Assembling a Neck Strap
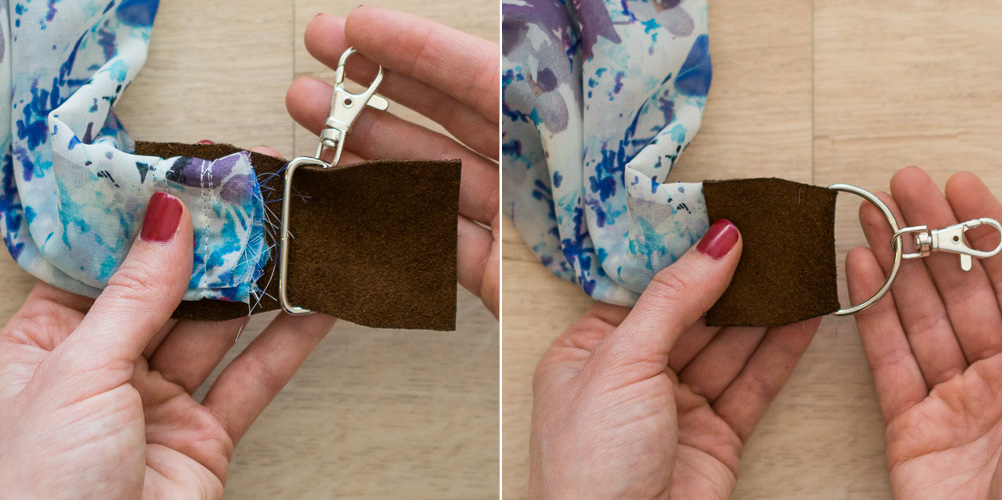
Place one end of your strap inside one of your leather/suede pieces. Put your hardware in place around the leather/suede. Line up the folded edges of your leather/suede piece and ensure no fabric is visible at the sides. (Tuck in where necessary.)
You won’t be able to pin it, so keep everything in place while you transfer it to your machine for sewing.
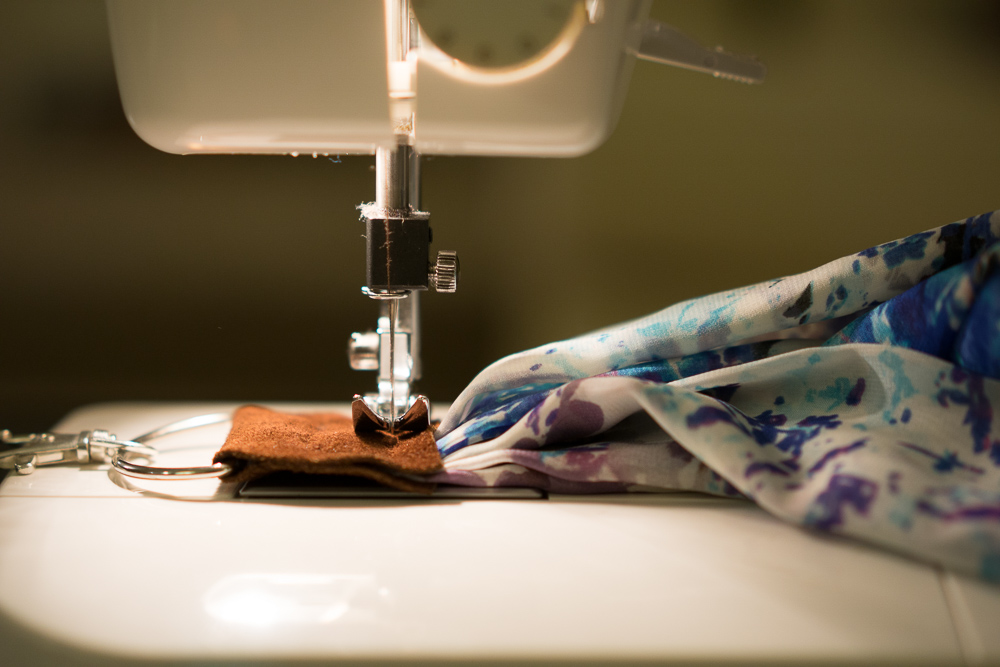
Use the edge of your machine’s foot as a guide. Line it up with the edge of your leather/suede, and start in the top center. Use the hand crank to sew toward the end, and when you near the other edge (with approx the same width remaining as the space between your sewn line and the leather’s edge), stop with the needle down. Lift the foot and rotate the fabric 90 degrees. The right edge of the foot should again align with the edge of your leather. Continue sewing using the hand crank. When you make your next 90 degree turn, ensure that your foot will clear the hardware when you sew your next straight line across. Keep hand cranking and rotating until you’ve returned to where you started.
Pro-Quality Tip: At this point, I like to go just one stitch past where I started. I then cut my ends long enough so I can tie a knot with the starting threads on both sides. I’ll then trim as close as possible to the knot and then use a small dot of leather glue to keep it from coming undone.
Repeat with the other side of your strap.
4b. Assembling a Wrist Strap
Place both ends of your strap inside your leather/suede piece. Put your hardware in place around the leather/suede. Line up the folded edges of your leather/suede piece and ensure no fabric is visible at the sides. (Tuck in where necessary.)
You won’t be able to pin it, so keep everything in place while you transfer it to your machine for sewing.
Use the edge of your machine’s foot as a guide. Line it up with the edge of your leather/suede, and start in the top center. Use the hand crank to sew toward you, and when you approach the edge (with approx the same width remaining as the space between your sewn line and the leather’s edge), stop with the needle down. Lift the foot and rotate the fabric 90 degrees. The right edge of the foot should again align with the edge of your leather (shown above). Continue sewing using the hand crank. When you make your next 90 degree turn, ensure that your foot will clear the hardware when you sew your next straight line across. Keep hand cranking and rotating until you’ve returned to where you started.
Pro-Quality Tip: At this point, I like to go just one stitch past where I started. I then cut my ends long enough so I can tie a knot with the starting threads on both sides. I’ll then trim as close as possible to the knot and then use a small dot of leather glue to keep it from coming undone.
5. Finishing Touches
You’re almost done! There’s just a couple of things left to do to really make this a pro-quality DIY strap.
First, check your edges. Sometimes the sewing process can tweak the edges so they’re no longer perfectly aligned after sewing. Carefully trim away extra leather/suede as necessary.
Next, use a small amount of leather glue to seal the inside edges of your leather/suede piece(s).
That’s It!
Congratulations! You’ve completed your pro-quality DIY camera strap.
Prefer to Buy?
I sometimes sell these camera straps on Etsy! If I’m not traveling internationally, chances are I may be available to make one. View my Etsy shop to find out!
Pro-Quality Material Shopping Tips
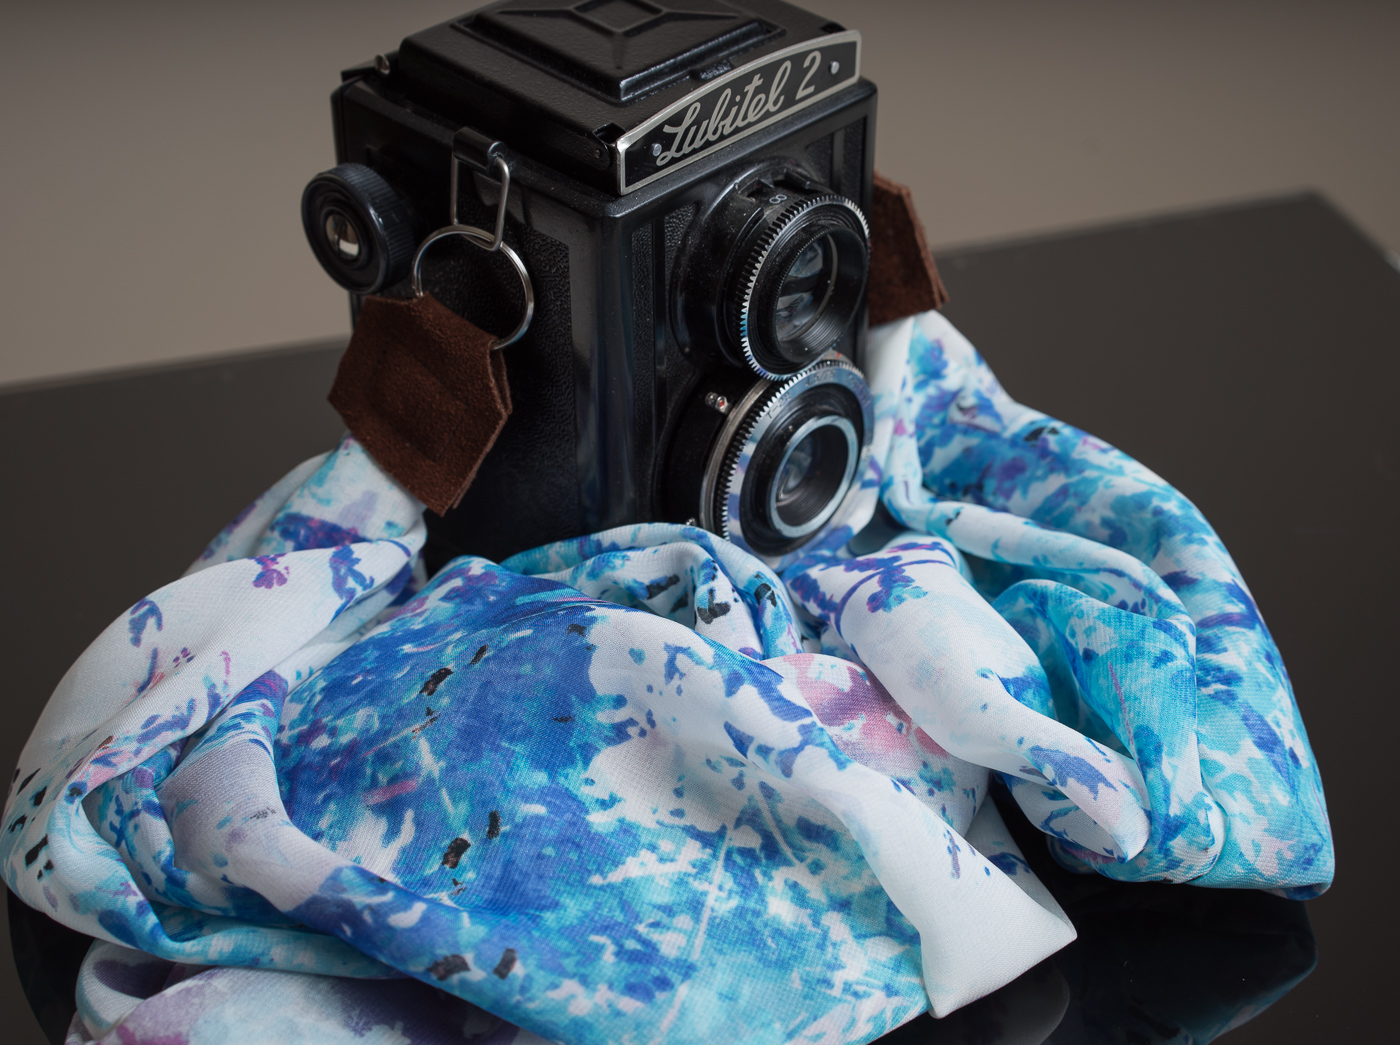
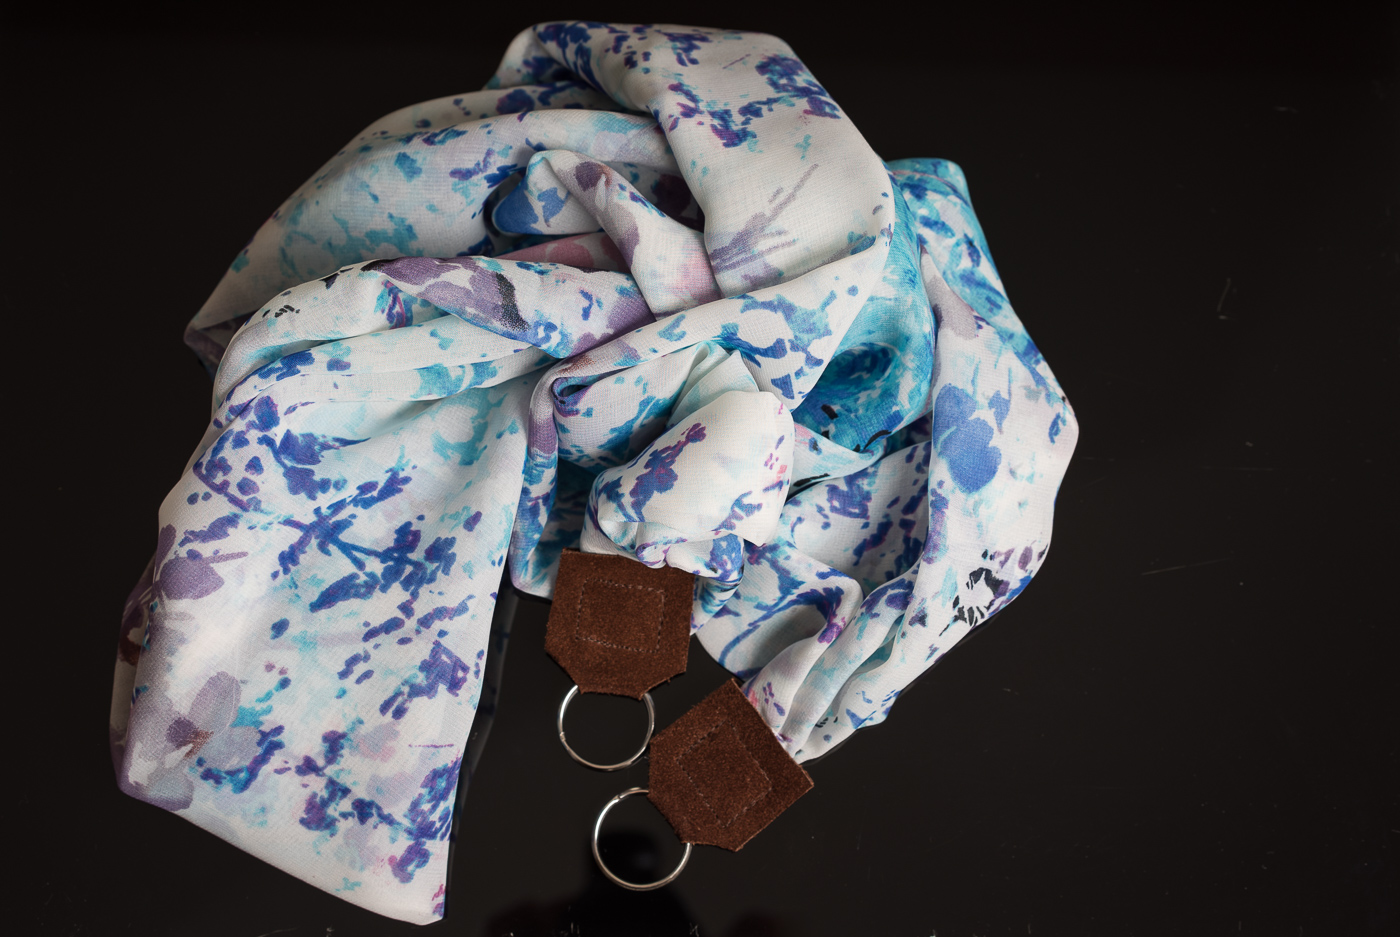
FABRIC: If you’re shopping for fabric, I’ve used both a light, sheer silky fabric (pictured above) and a standard smooth silk, and both ended in great results. The sheer material has a more lightweight feel and is easier to sew. (My neck strap made from this material is currently attached to my lightweight Lubitel 2, and my wrist strap is attached to my Sony a6000, as shown above.) The standard silk has a smoother feel and can hold a heavier camera more comfortably, but it would likely feel too hot on your skin on a summer day.
SUEDE COWHIDE: I’ve only used suede cowhide, as that’s all I could find at Jo-Ann’s, but most other tutorials use traditional leather. I’d imagine the buckskin may be a little easier to sew and more forgiving if you make a mistake. If you’re just making one or two straps, you can get by with what I bought: suede cowhide elbow patches, available on Amazon or at Jo-Ann Fabrics. If you want to make several straps, it’s considerably cheaper to buy online than at a craft store. This leather and this buckskin are both well-reviewed.
HARDWARE: Depending on your camera, you may want a D-ring/lobster clasp combo (shown above) or a simple key ring. The D-ring I used is about 1.5″ wide. You could go smaller for a smaller camera. Despite the attachment hardware you decide on, you’ll need one for a wrist strap and two for a neck strap.
HEAVY DUTY THREAD: Get a high-quality, thick thread, but make sure you can thread it through the eye of your needle. As an alternative, you can use standard thread and sew over the same path twice, but you will risk cutting your thread that way. I used this method for three straps and cut my thread twice. (On those I just sewed over it a third time.)
I hope you enjoyed this tutorial. If you’ve got a question or comment, reach out below, and if you want to share your finished strap, post a photo to our Facebook page.
If you liked this post, you may also want to check out our other DIY travel project posts:
Author Profile
- STG Founder & Contributing Editor
- Diana is an outspoken, DIY-ing, star-chasing, hockey-loving, dog-owning, veggie-eating professional wanderer. And that's not the half of it. Not long ago she jumped ship from a comfy, predictable American life, sold all her stuff, and set out to explore the unknown. Now a full-time traveler, Diana believes that spontaneity, a smile, and an organized suitcase are the three key elements to a happy nomadic existence. Follow her personal travels on North To South.
Latest entries
- June 22, 2017WeddingWedding Planning for the Bride On the Go — Getting Started and Setting a Date
- February 27, 2017Health and BeautyFirst-Timer’s Guide to Iceland’s Blue Lagoon
- October 5, 2016FashionCozy Cute Camping in New Zealand (Outfit)
- July 3, 2016Editor's PicksLupine Summer (Outfit)


Looks amazing! And I love your tutorial, you rock, girl! Thanks for the mention.
Thanks Chrissy! Your tutorial was super helpful for me when I was trying out my first strap, so I had to mention it. I think it makes DIY-ing easier when you have several good tutorials to read through when you’re starting a project. 🙂
[…] main reason I love this camera for travel is it’s extremely transportable. I’ve made a custom silk camera strap for it that makes it even easier to carry, which attaches nicely to the loops on the […]
[…] Like my camera strap? Learn how to make this comfy DIY scarf camera strap over at Stylish Travel Girl! […]
[…] to glam up your travel cam? View our DIY for making a custom camera […]
[…] Note: I’ve also replaced the stock shoulder strap with one of my lovely and ever-so-comfortable handmade silk camera straps. DIY instructions for THAT over here. […]
Beautiful! I’m inspired to make one!
Do you have a heavy duty machine? I’ve tried sewing leather before and my machine sounded … grumpy.
Nope, no heavy duty machine. In fact I think it was only around $100!
The secret is to just rotate your wheel to sew by hand. That gives you precision and allows you to stop if you feel like the needle is going to break rather than make it through.
Also, I think using the cowhide rather than traditional slick leather helps because it’s a bit more porous and easier to sew.
I love this tutorial! I don’t have a sewing machine but I am going to try to borrow someone’s to do something like this. It looks soooo comfy to wear too.