

Easy Pleated Maxi Skirt DIY Tutorial
Perfect for a variety of events and seasons, the jersey knit maxi skirt is a fashionable, flattering and comfortable fashion choice. And it gets EVEN better when you get to pick the fabric! Below is an easy-to-follow photographic tutorial of how to sew your own pleated maxi skirt.
Difficulty: A couple steps are a bit tricky, so I don’t recommend this tutorial for complete beginners, but if you’ve had some previous sewing experience, you can totally make this skirt!

Easy Pleated Maxi Skirt (shown with scarf ring — my favorite look!)
What makes this skirt unique: This tutorial shows my own pleat method rather than what I’d call the “bunch” method that most other maxi skirt tutorials show. I made one skirt with that method and decided I’m way too much of a perfectionist to tolerate sewing bunched material. If you’d agree, then this tutorial is for you. I’d say this pleat method is actually easier than the bunch method because it keeps your fabric more organized. It’s way easier to see what you’re doing this way!
As with any sewing tutorial, I recommend reading through all 18 steps before you get started.

I made this red skirt for STG’s Portraits of America photo shoot.
Good luck and have fun making your skirt!
How to Sew a Perfectly-Pleated Maxi Skirt
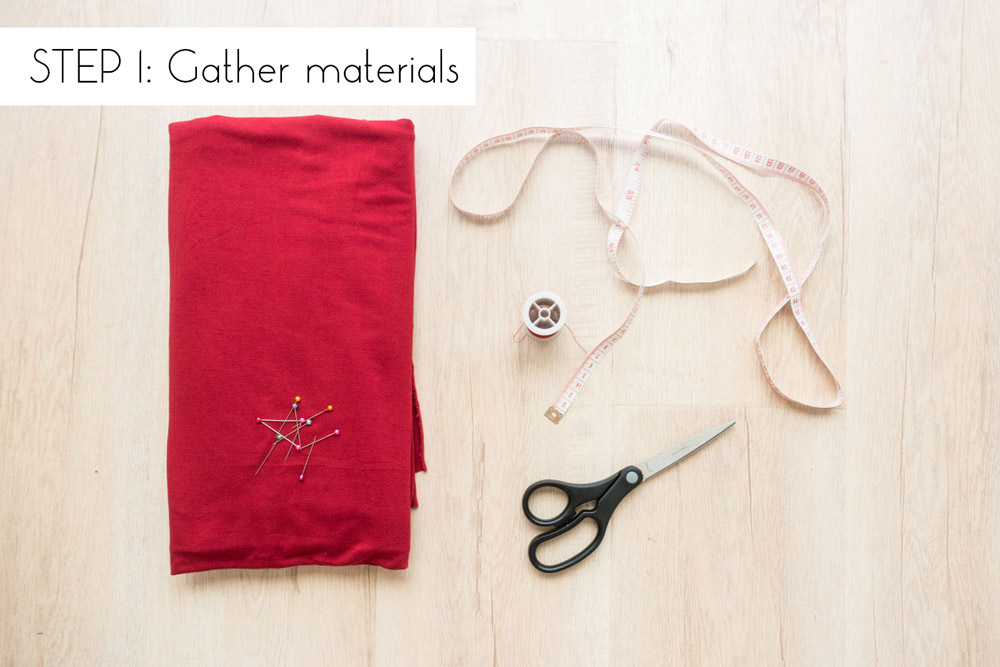
For this project, you will need:
- 1.5 yards of jersey knit fabric*
- matching thread
- sewing machine
- pins
- measuring tape
- scissors
*This should be enough fabric for most women, when using standard-width jersey knit fabric. If you’re tall, see step 3 before you purchase fabric.
I like plentiful pleats, so I use plenty of fabric. Some jersey knits can be a bit sheer, so using more fabric will reduce the need to wear a slip underneath.
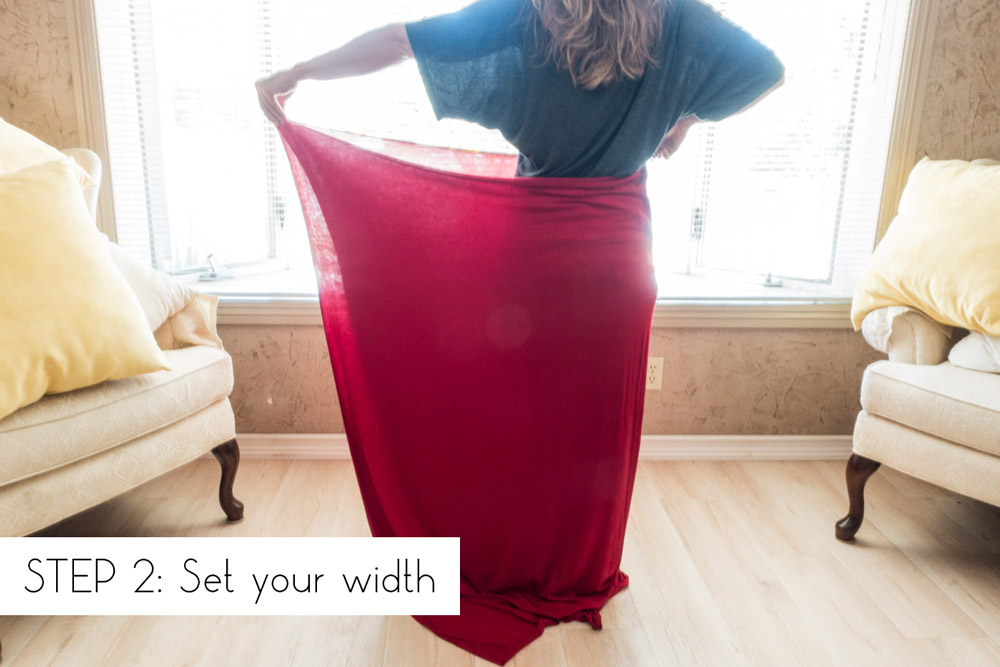
I make the folded width of my skirt piece at least twice that of my hips.
Approximate your measure by wrapping it around yourself (as shown above). My fabric is already the perfect width (most fabrics will be), with no trimming required.
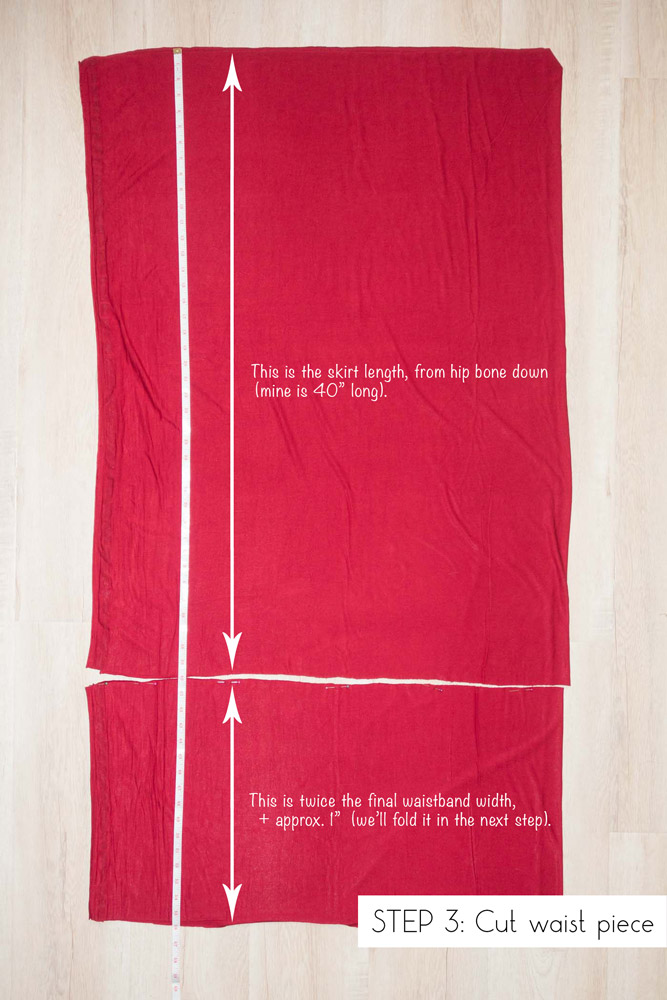
Next you’ll make your first cut.
Fold your fabric in half (like it was on the bolt when you bought it). If you bought 1.5 yards of fabric, it will be 54″ long.
Cutting it at 40″ (as shown) will give you a final waistband thickness of 6.5″ — (14″ – 1″) / 2 — and a length of 40″ for your skirt piece, which will fall from your hip down. If your hip bone is more than 40″ from the ground (or you want a skirt with a long train), purchase a longer length of fabric.
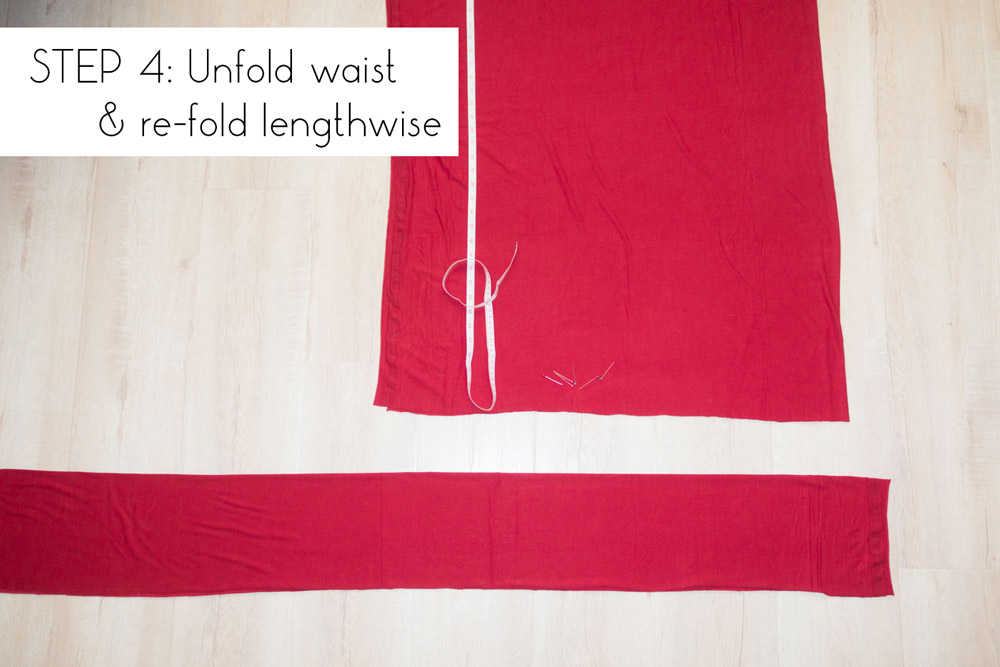
Unfold your waistband piece and then fold it the other way.
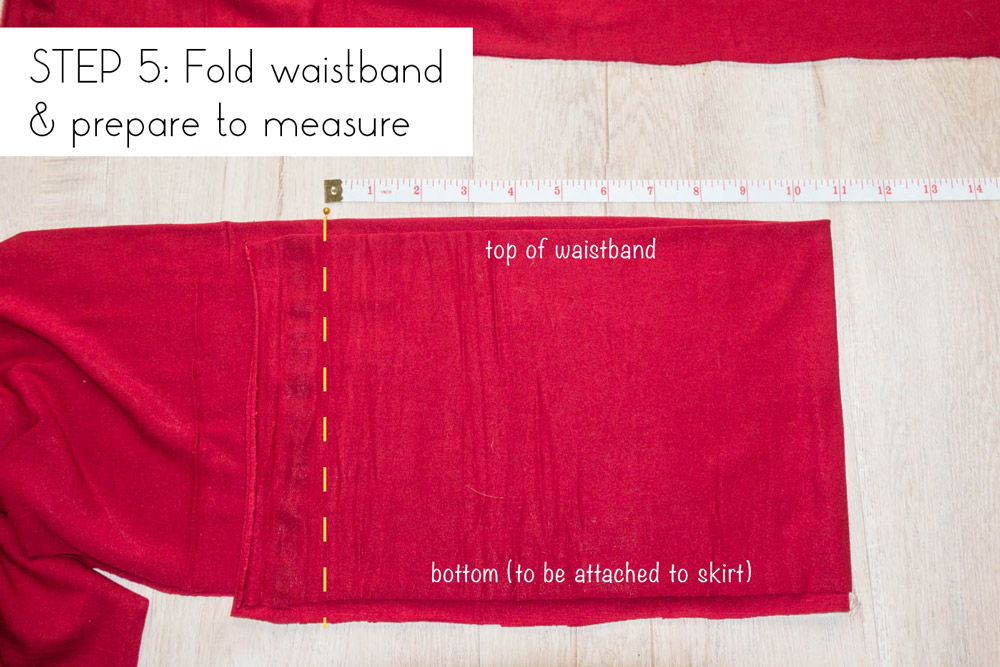
Take the far right end of your waistband piece and fold it over to the left.
If you want, you can wrap this around your waist to judge how large or small you want your waistband to be. Jersey knit fabric is typically VERY stretchy, and you will need it to be tight to hold up the weight of the skirt. Follow guidelines in Step 6 to determine where to cut it.
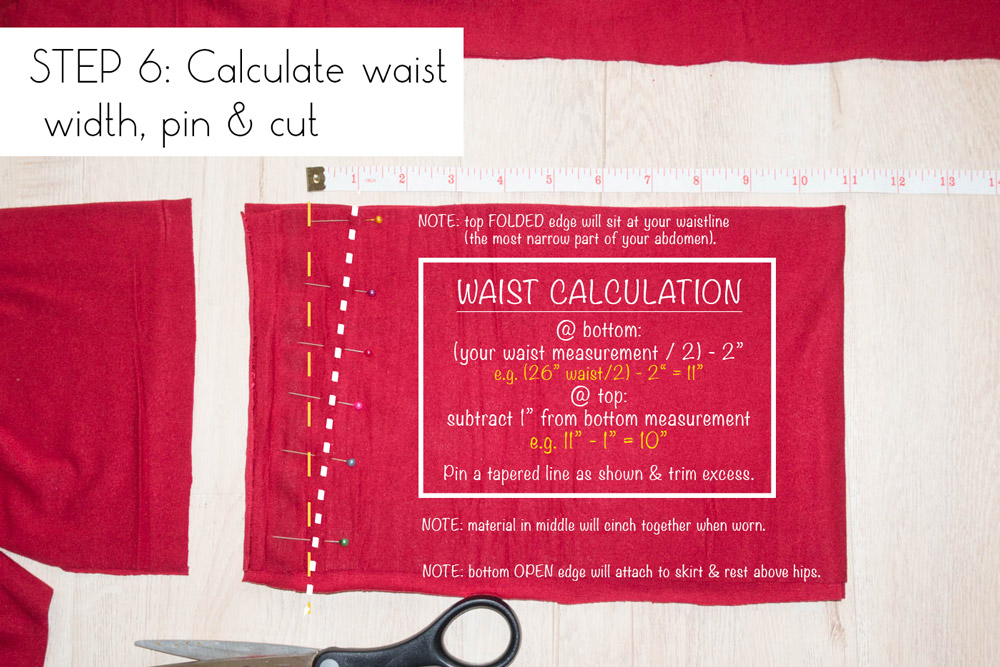
My waist (narrowest point of my midsection) measures 26″around and I used the calculation above to determine where to cut my jersey fabric. I chose to taper my seam (as shown) so that my skirt would be tightest at the top, resting snugly at my waist, and tapering out slightly around my abdomen.
If you prefer simplicity, sewing a straight line will work, too (just pin and sew along the yellow line instead of the white).
If you’re nervous about making it too small, cut your piece larger at first, wrap it around yourself to see how it feels at different measurements. The top measurement is the most important because that will determine where your skirt sits when you wear it. If you make it too loose, your skirt won’t stay put!
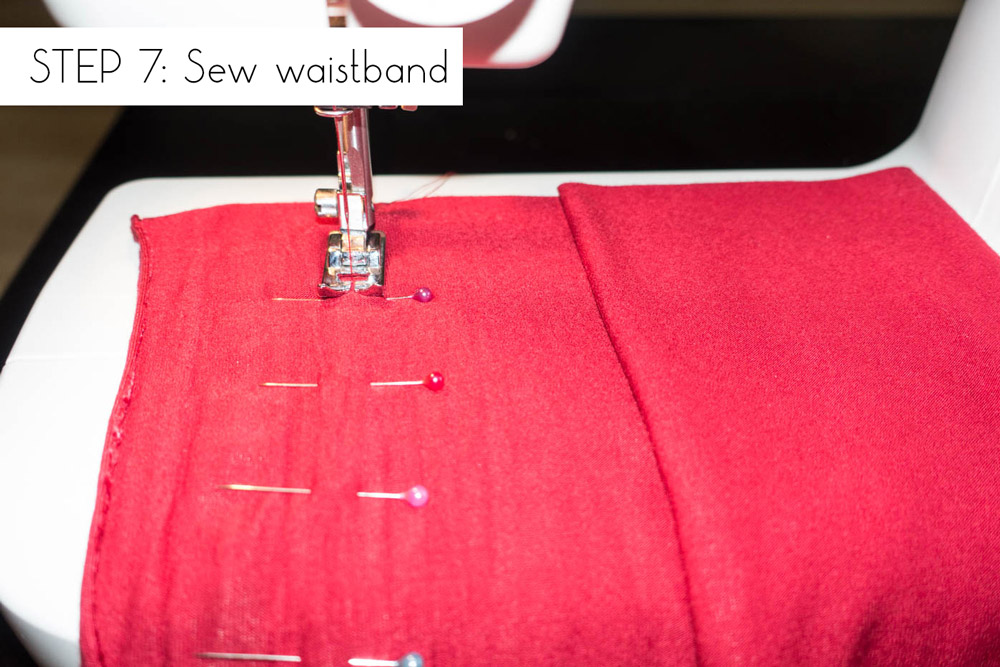
Use a zigzag stitch to sew along your pin line. This stitch allows for more flexibility in stretchiness when you pull the skirt up over your hips.
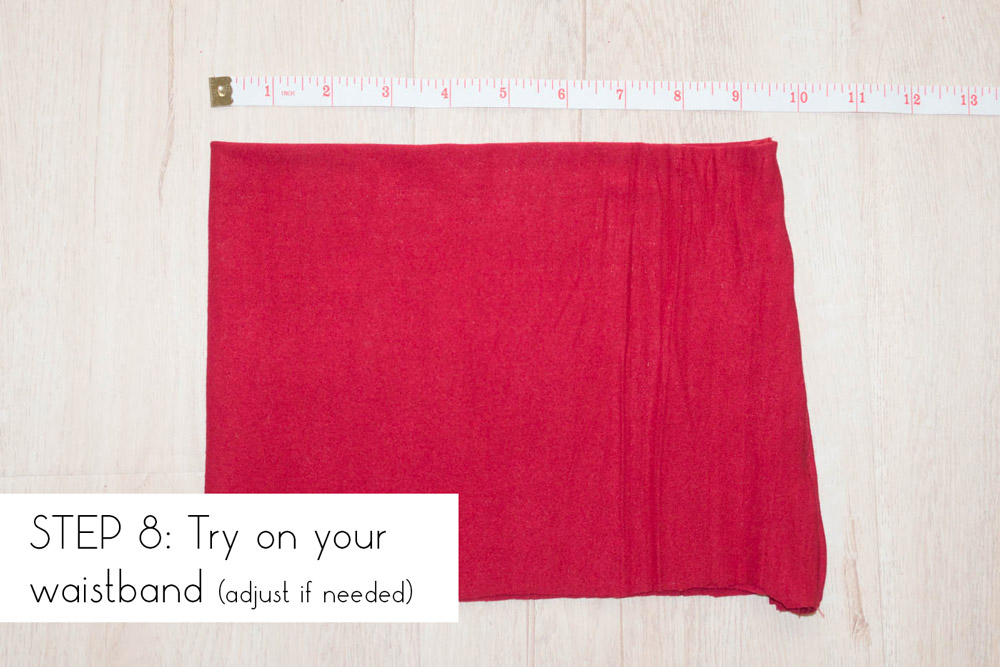
Turn it right side in and try it on!
If you followed the guidelines in step 6, it should fit nice and snug (but not uncomfortably tight).
If it’s too big, re-sew it to make it tighter. If for some reason it’s too small, you likely have enough material left from your cut in step 6 to make a second waistband. Or you can get out the seam ripper…
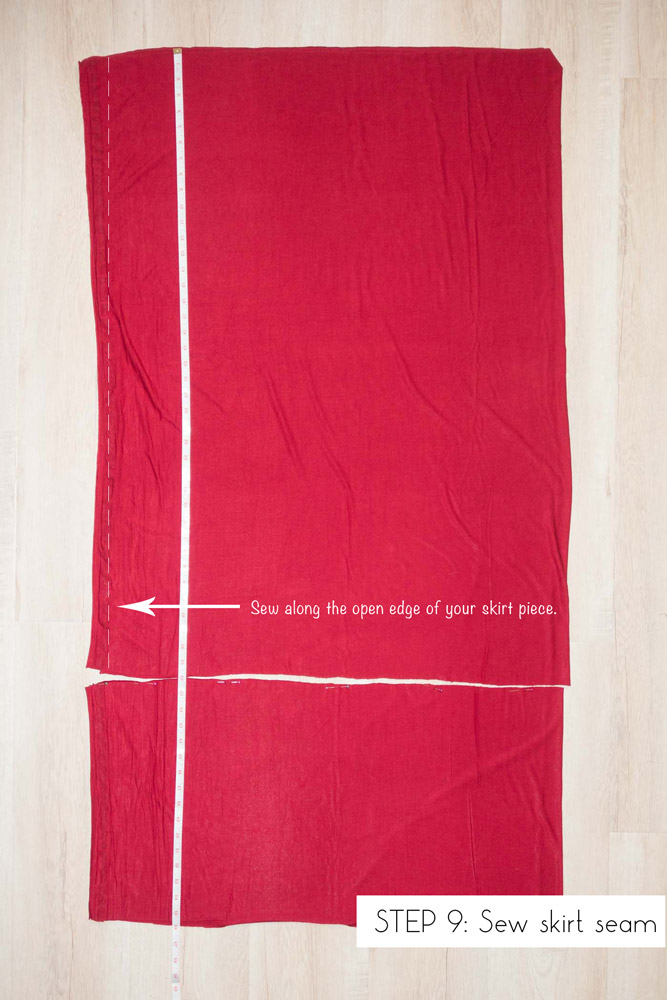
Next you should sew your skirt piece.
I use the zigzag stitch here, too, but it’s not as necessary as it is for the waistband piece since you won’t be stretching this part when you wear it.
Before you sew, trim the length of your skirt piece as needed. I find it easiest to just hold it up to myself (hold the top of the fabric at your hip bone) and add a pin to mark the length I want rather than trying to measure it. I make mine extra long because I like to wear my maxi skirts with a fabric-gathering ring (like a large scarf ring — similar to this one) in the front.
Bonus: the skirt can actually double as a dress (depending on your chest size), so I make mine longer for that reason, too.

Carefully trim away any excess fabric from your two pieces, leaving about a half inch of fabric from your seam.
Your two pieces should look something like this.
Now comes the hard part: sewing them together.
(Now’s a good time for a break, if you want to have a coffee, go for a walk, etc. I’ve tried to make this part as clear and simple as possible, but when you’re sewing such a large piece of fabric to such a small piece of fabric, the going gets a little bit tough. So it’s important that you’re fresh for these next steps!)

To do this:
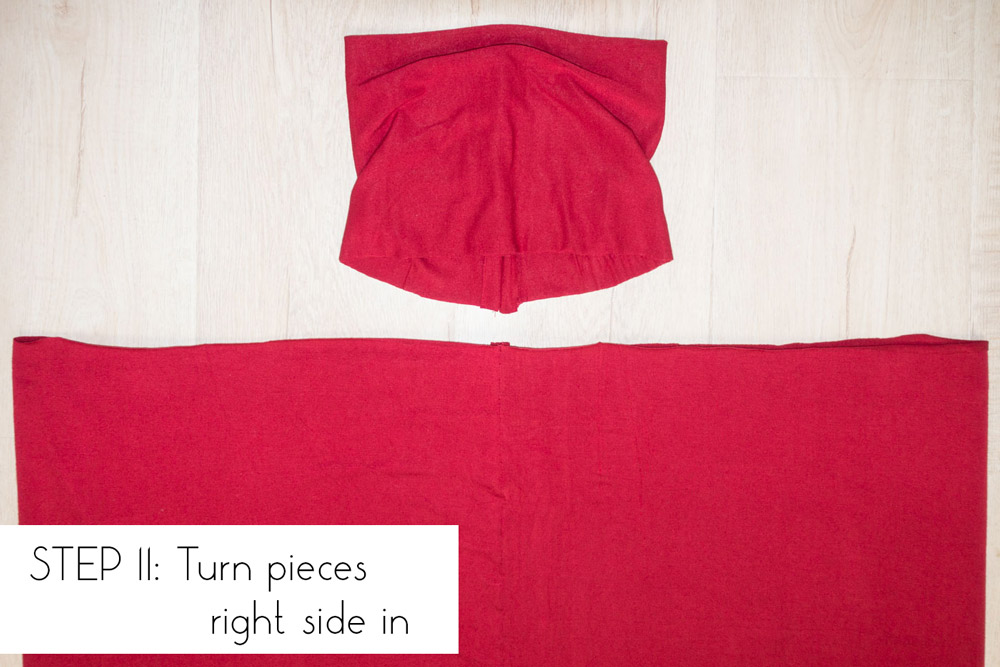
(a) Lay out your skirt piece right side in with the seam on top and in the center (as shown in step 11).
(b) Take your waistband piece and turn it inside out. Take the seam at the bottom edge of your waistband (on the side with the open edges) and align it with the seam on the top edge of your skirt, as shown above. In the photo we are looking at the top edge of your skirt piece (on bottom, right side in) and the bottom edge of your waistband piece (on top, inside out).
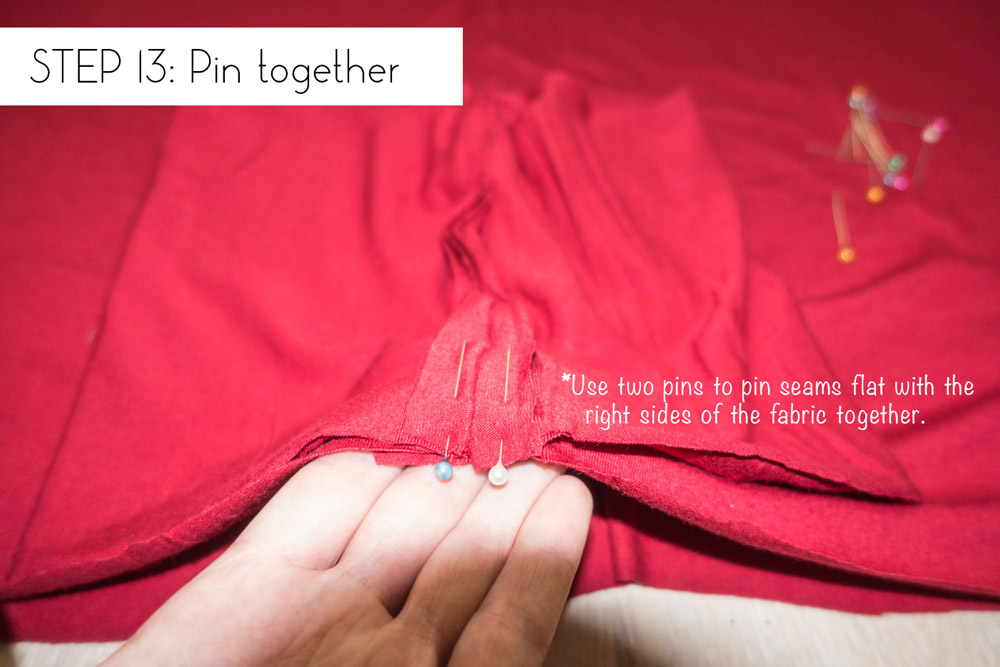
Once you’ve got it lined up, pin it! This seam will run down the back center of your skirt.
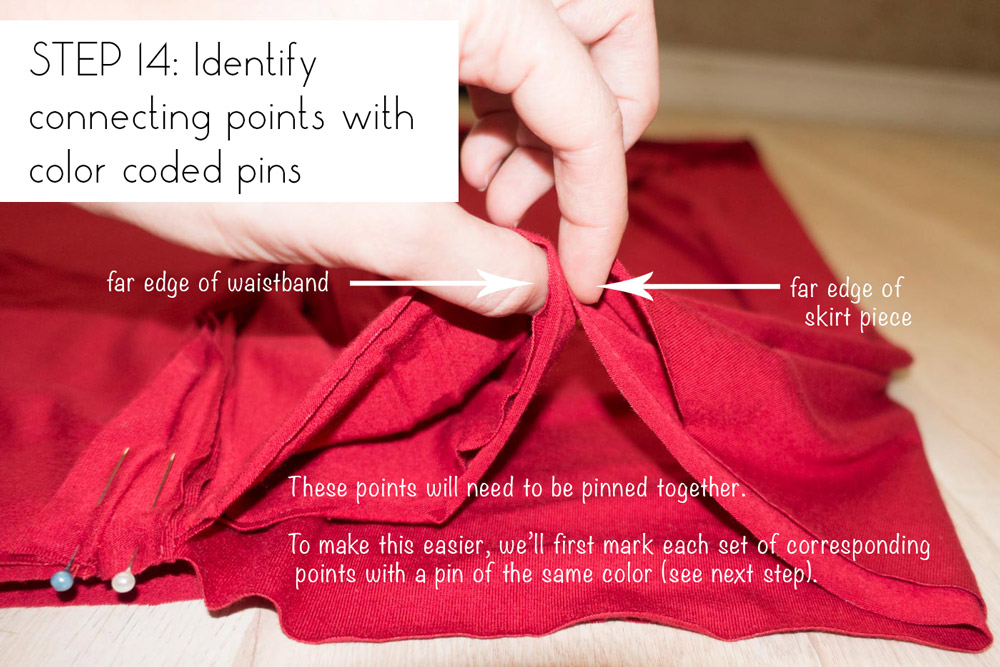
Nothing to “do” in this step other than understanding what we’re about to do…
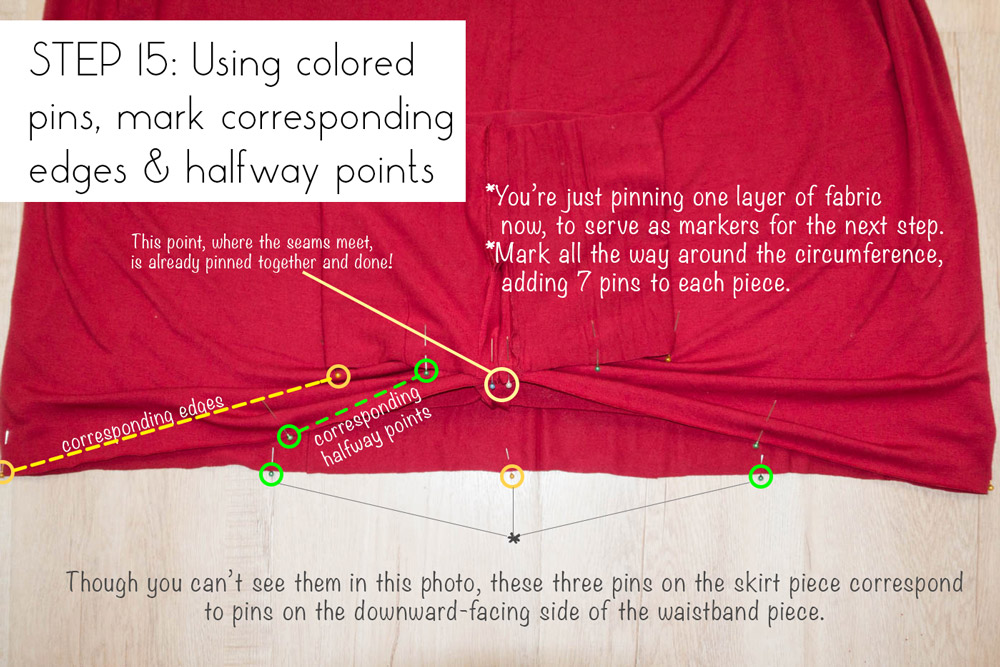
Color-coded pins will really help here. Use the same color to mark each corresponding pair of points.
You’ll be adding a total of 7 pins to each piece.
If you don’t have colored pin heads, get creative and use what you have: colored tape, safety pins with colored paper, etc. Just make sure it’s something that will stay put when you’re moving the fabric around.
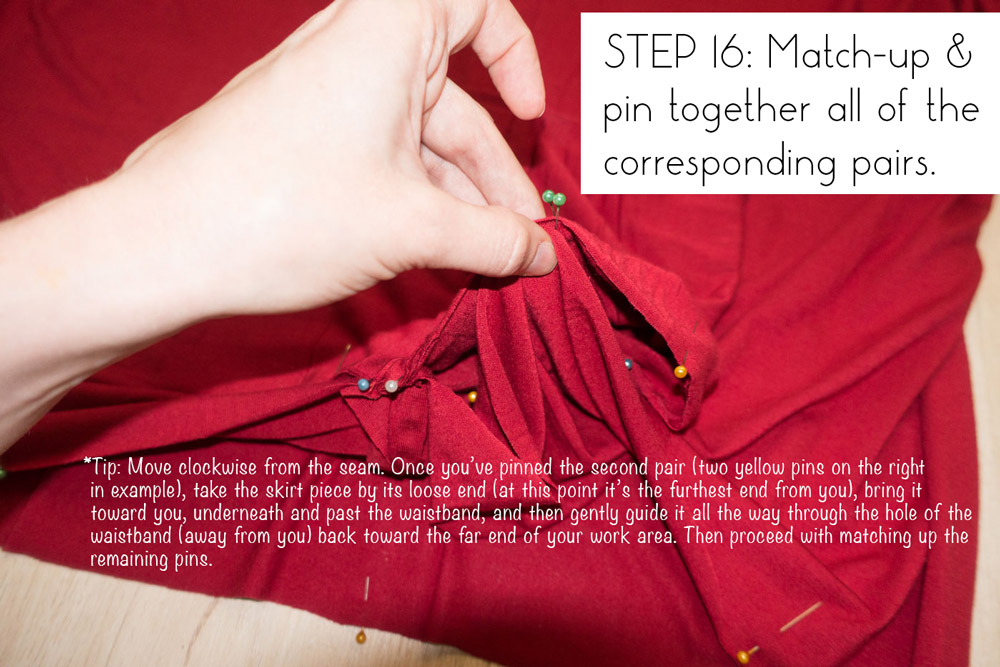
This step is the hardest part. It gets tricky with all the skirt fabric and you’ll need to move the skirt to be INSIDE rather than UNDERNEATH the waistband. See tip on photo for how I accomplish this.
If this step is confusing (and don’t feel bad if it is), start by just ADDING the pins, without removing any of your markers. That way you can start this step over if you need to.
When you’ve made it all the way around, you’ll have replaced your pin pairs with single pins. (If you’ve kept in your marker pins, you can remove them at this point and leave only those that are holding your two pieces together.)
You should now have 9 pins in place: 2 at the seam (back of skirt), 1 at the front center, 1 on the left side, 1 on the right side, and a halfway point between each of those. Note: In my photo above, my seam is on the left, marked with the blue and white pins.
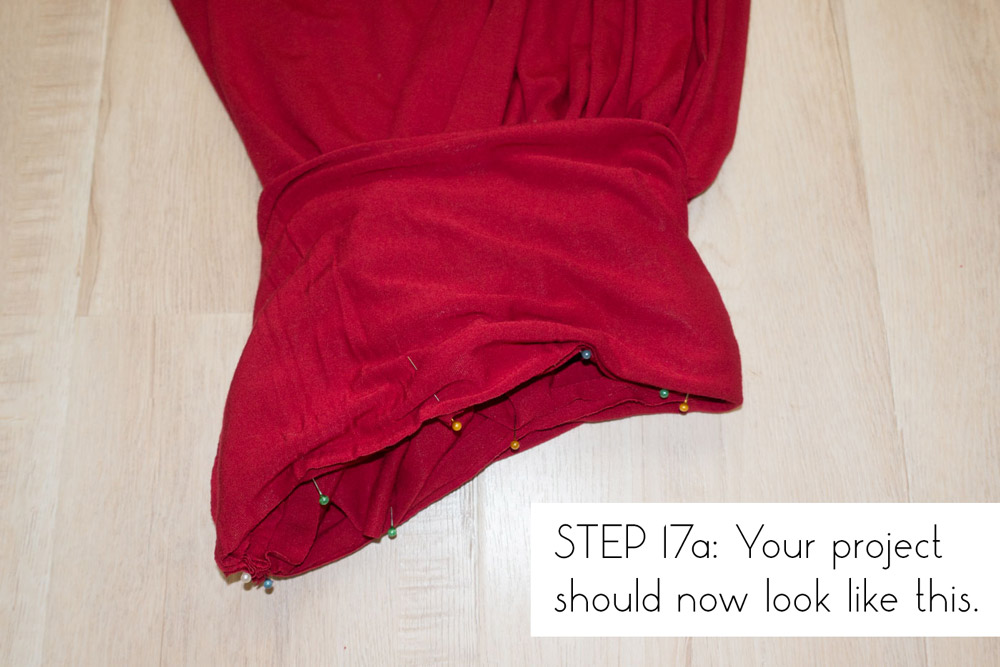
There will still be a lot of extra fabric flopping around on the inside at this point.
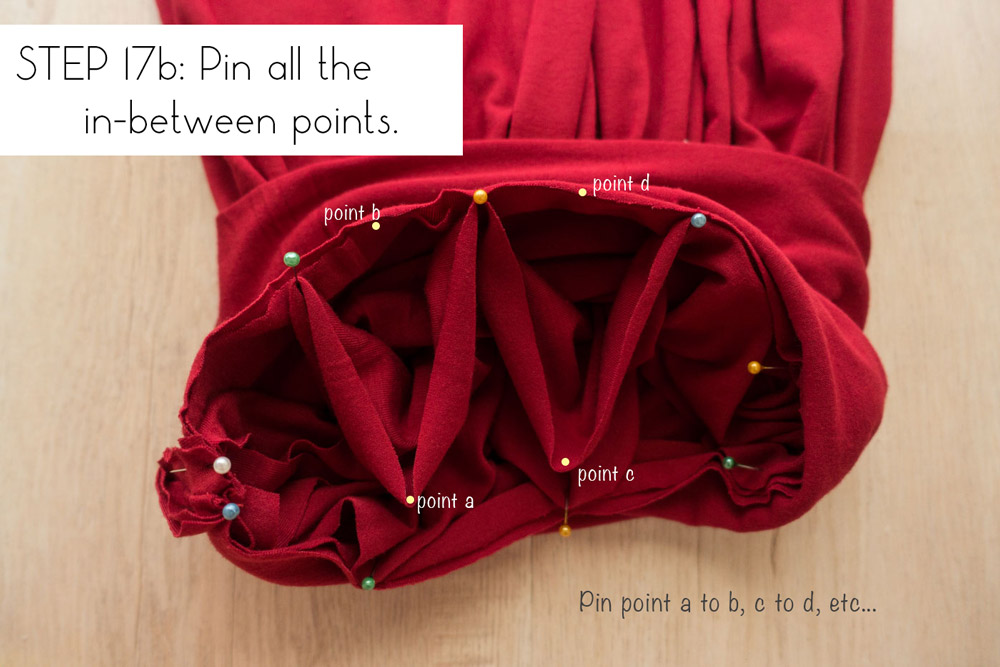
We’ll remedy that by adding a new pin between each of our current pins. See photo above for details. You should be adding 8 pins in this step.
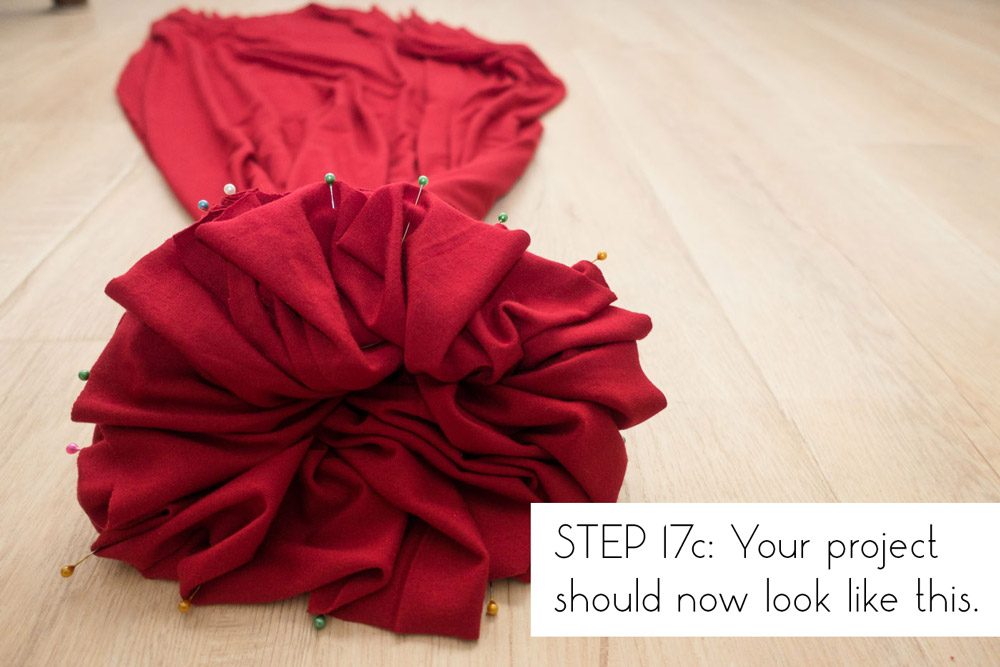
Now your project will look something like organized chaos.
And we’re almost done!
Just turn your project inside out to get ready to sew it. (It’s already on it’s way inside out in the photo above. Just stick your arm through that hole in the center of your project, grab the bottom of your skirt, and pull it through.) Your pleats (‘flaps’?) should be on the outside for sewing.
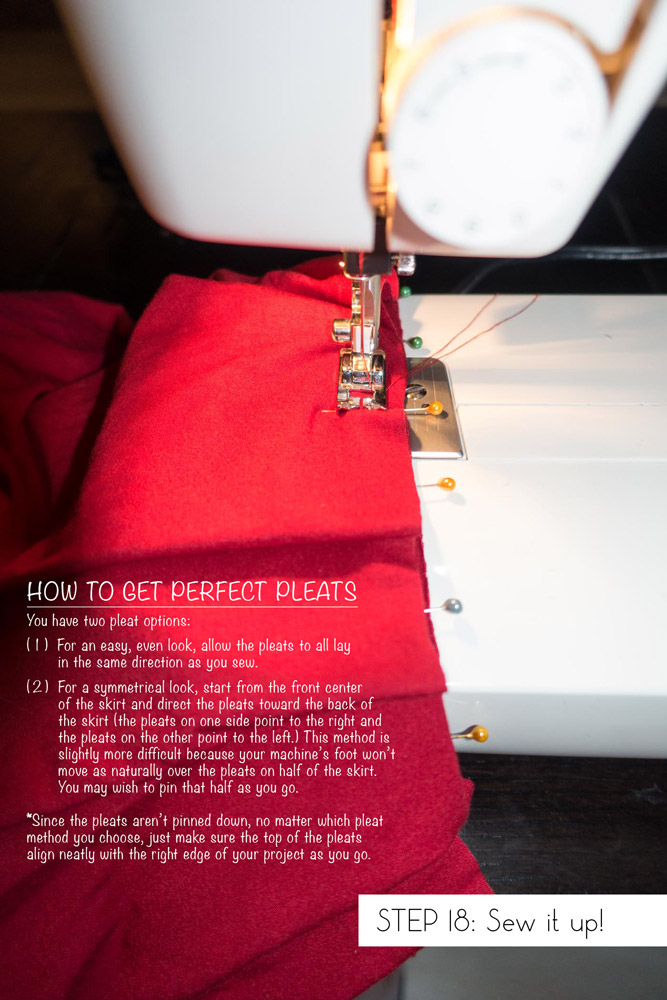
Use the zigzag stitch to sew around your skirt.
Take your time and pause before each pleat to make sure the fabric is laying nicely before you begin sewing over it.
Go all the way around, trim off your extra threads, and try it on! You made a maxi skirt!


Here’s me wearing a teal version of this skirt at Burning Man. More about that festival on North to South.
Have you made your own maxi skirt? Do you have any tips to share? Please share in the comments. Questions are welcome, too!
Author Profile
- STG Founder & Contributing Editor
- Diana is an outspoken, DIY-ing, star-chasing, hockey-loving, dog-owning, veggie-eating professional wanderer. And that's not the half of it. Not long ago she jumped ship from a comfy, predictable American life, sold all her stuff, and set out to explore the unknown. Now a full-time traveler, Diana believes that spontaneity, a smile, and an organized suitcase are the three key elements to a happy nomadic existence. Follow her personal travels on North To South.
Latest entries
- June 22, 2017WeddingWedding Planning for the Bride On the Go — Getting Started and Setting a Date
- February 27, 2017Health and BeautyFirst-Timer’s Guide to Iceland’s Blue Lagoon
- October 5, 2016FashionCozy Cute Camping in New Zealand (Outfit)
- July 3, 2016Editor's PicksLupine Summer (Outfit)


[…] how to sew this skirt in my maxi skirt sewing tutorial on Stylish Travel […]
I’m all thumbs when it comes to sewing so I’ll have to stick to buying my skirts but I love jersey as a travel fabric. It’s so comfortable, hard to wrinkle, and I can dress it up or down as the mood and occasion suit me. I also love how you can put a maxi skirt to double duty as a belted midi dress.
You’re so right! I’m amazed at how hard it is to wrinkle jersey fabric. I’ve had my skirt packed up in a garment folder whenever I’m not wearing it on my current road trip and I haven’t even had to use Downy Wrinkle Release (another magical travel tool) on it once! 🙂